Showing posts with label bike. Show all posts

Wednesday, October 17, 2012

Lance's Fisting Technique

Even with ice in his beard, his fingers are warm.
It's getting into the cold season, but that doesn't mean you should stop riding.   With the right equipment, you can continue riding all the way through the winter, and don't have to subject yourself to the horrors of indoor stationary riding.

That said, even with the proper equipment, many folks have trouble with cold hands and feet, myself included, even with thick, heavy gloves.  Thick gloves can make controlling the bike more difficult, and if even thick gloves aren't keeping your fingers warm, then the call of the indoor trainer may be getting stronger.  However, one of my riding buddies (Lance) has shared a trick with me that allows me to ride through the winter with nothing more than ordinary full-finger gloves!


Here's how it works:

  1. Start your cold ride.  You may be warm from the house (or car) but you were resting, so you're not "warmed up".  Ride for a little while until you start to warm up, you should be breathing hard.  This usually coincides with your fingers starting to get cold.  
  2. At this point, stop riding, and pull your fingers back into your glove, making a fist inside the glove.  The heat from your palm will warm your fingers.  (On the road or a non-challenging MTB trail, you may also be able to do this while still riding, but if you try it and hurt yourself, I will point and laugh.)  
  3. This shouldn't take long, just long enough to get your fingers to stop being really cold.  Don't stop long enough that you cool down, either.  It's just a quick stop, if you're stopped for more than a minute you're probably doing it wrong. 
  4. Once your fingers are warm-ish, you can put them back in the glove like normal, and resume riding.  
  5.  Your fingers should stay warm for the rest of the ride!
Since your core temp is up and you're properly warmed up, the blood is flowing, and it's carrying heat from the exercise.  Since your fingers aren't brutal cold anymore, the blood is able to get to them, and keep them warm.  I've been doing this for a couple years now, and have been able to ride through sub-freezing temps using the same full-finger gloves that I rode in the summer.  Last year I was halfway through the winter when I realized that the 661 gloves I was using had an open mesh on the side of the fingers.  Even with the open mesh (I could see the skin of my fingers!) my fingers never got cold past that initial warm-up period.

Give it a try!

Now for toes, this trick doesn't work as well -- you can't make a fist with your feet!  I'm still working on this one, but for me, the trick seems to be having shoes that are big enough to have thicker socks and still leave room for your feet.  That seems to be the key - if your feet are too snug in the shoes, you won't get circulation, and you'll have the same problem as your fingers above. If your shoes are not quite big enough, you can cheat it out a little bit by loosening the straps, especially the ones towards the front of the foot.  I've found that helps a bit.  Wind can still be an issue, and I've heard that clipless pedals can actually act as a heat sink - a larger aluminum clipless pedal can draw heat out of your foot.  I dunno how legit that claim is since there is a plastic sole, and usually, a plastic cleat between your foot and the pedal, but I do run thicker insoles in the winter.  The big thing is don't restrict your feet, and I often try to wiggle my toes to make sure they're still getting circulation.

Monday, August 27, 2012

Full list of the Strava segments in Nockamixon

Most of the Strava segments in Nockamixon are my work.  After seeing the awful mess that is segments in Wissahickon, I decided to create what I thought were the key segments for Nockamixon and hopefully that would prevent everyone and their mom creating new, conflicting segments.  The only problem is sometimes I have trouble keeping track of all of them!  Plus, there are a couple good segments that were created by other folks.  Just creating this post so that I have a list of all the Nox segments, and can refer to it if I need.

Full Lap Segments:

Nox Full Loop (S/F at Tower Rd trail split) (http://app.strava.com/segments/2214794)

Originally, someone else created "Full Nox Loop" and it was good, except Strava's segment matching is kinda crappy, and if you left out the Hammer trail, you'd get a match, which is why Bob Eichlin isn't the KOM.  Someone else created Nox short loop CCW which cuts off the Hammer trail, but this doesn't fix the Strava matching problem, and so still matches both types of laps.  Someone else created Nox Full loop S/F at lot entrance tower rd sign, but that one starts at the trailhead of the lot.  I'm not a fan of that, since there is a bunch of two-way traffic on this part, and as such I prefer to roll in on that bit of trail easy, and then get going once I hit the trail split about 1/4 mile from the parking lot.  One thing that would be nice to add is a segment that matches if folks start at the 563 entrance, but since I don't do that, I probably won't bother.

North segments:

The north section of the park includes the Cold Spot and Hammer trails.

Cold Spot CCW (http://app.strava.com/segments/1079674)
Cold Spot CW (http://app.strava.com/segments/1172770)

Hammer CCW (http://app.strava.com/segments/1079793)
Hammer CW (http://app.strava.com/segments/1292643)

Cold Spot and Hammer CCW (http://app.strava.com/segments/1172780)
needed - Cold Spot and Hammer CW ( )

Central segments:

Since these two loops (Haycock Run and EWR) are rarely ridden as loops, I split them into upper and lower segments to improve matches.

Haycock Run uphill (http://app.strava.com/segments/1267108)
Haycock Run downhill (http://app.strava.com/segments/2200638)
Haycock Lower SB (http://app.strava.com/segments/2118401)
Haycock Lower NB (http://app.strava.com/segments/2119306)

EWR lower (connector) NB (http://app.strava.com/segments/1079884)
EWR lower (connector) SB (http://app.strava.com/segments/1079866)
EWR upper NB (http://app.strava.com/segments/1204480)
EWR upper SB (http://app.strava.com/segments/1247461)

South segments:

Since this is a loop that starts and finishes in close to the same area, it matches in either direction, so there's no point for CW and CCW segments.


Jaywalk and South Park: (http://app.strava.com/segments/1181277)

These two are little mini-segments starting from South Park Rd and climbing away in each direction.
South Park Rd climb (http://app.strava.com/segments/1254148)
S Park to Dam (http://app.strava.com/segments/1886087)

Wednesday, July 25, 2012

Spoke and nipple choices

Next in the selection process in building good road wheels is the spokes and nipples.

First, let's talk brands.  There are two major brands I deal with, DT Swiss and Sapim.  The spokes between the two are very similar, and I've built with many of both.  I don't have a specific preference between the two in a similar spoke.  There is also Wheelsmith, but I have not done as much with them for the simple reason that they don't seem to be as prevalent.  I've got nothing against them otherwise.

As for the spokes themselves, there are three major types, straight gauge, butted, and bladed.

First is straight gauge.  That means that the spoke remains the same diameter from one end to the other.  These really only have a place in cheap wheels.  You don't want cheap wheels, so forget about straight gauge spokes.  (They are also good if you're building your first set of wheels as they are much easier to work with when the wheel is up to tension)

Next is butted spokes.  Most typically, butted spokes are thinner in the middle to save weight, but this design also allows more elasticity in the spoke, resulting in an overall stronger spoke.  Some examples of butted spokes are the DT Competition  and Sapim Race with 2.0mm ends and a 1.8mm center section.  Coming in lighter are the DT Revolution and Sapim Lasers with 2.0mm ends and a 1.5mm center.  These have less material in the middle and so save even more weight, but they can be hard to build with as they really, really like to twist as they're tightened.  (I've got my tricks to deal with that) Two other spokes worth mentioning are the DT Supercomps, with 2.0mm at the J bend, 1.7mm in the center, and 1.8mm at the nipple end.  The center is slightly smaller than the 2.0/1.8mm spokes, and the narrower nipple end allows for a stronger spoke nipple.  These are great spokes, and I've built with them.  Lastly is the Sapim Strong, a spoke with a 2.3mm J bend, then a straight 2.0mm section all the way to the nipple end.  These are designed for really heavy duty wheels, like big guys, tandems, or loaded touring.  I've not had the need to build with these yet.  For most folks, I'd suggest the 2.0/1.8mm or the 2.0/1.5mm if you want to save weight and your wheelbuilder can handle it.

(you'll see terms like "single butted", "double butted", and even "triple butted".  I just go with "butted" and list the diameters.  Life's easier that way)

Finally, we've got bladed spokes.  The ones we're interested in are normal round spokes which have been flattened out to an oval profile to give an "aero" shape, one that's thin side-to-side (towards the wind) but longer front-to-back.  There are many varieties of bladed spokes, but for our purposes, we'll only consider one -- the Sapim CX-Ray or DT Aerolite, which share major specs.  Both start with a 2.0/1.5mm butted spoke, and are then ovalized into a 0.9x2.3mm cross section.  The key here is that the hubs don't need to be  modified like they would with other types of bladed spokes, and that's why these are the only ones that we'll consider.  These spokes are pretty amazing, since their weight is about as light as you can get, but due to the reshaping, they are strengthened, and have significantly improved fatigue limits.  So, they can make for a light, strong, aero wheelset.  Sounds awesome, doesn't it?  Well, they kinda are.  Awesome has a price, though -- these spokes are usually at least $2.50 each.  That adds up quickly in a wheel, especially when good butted spokes can be had for as little as $0.75 each.  Still, if you want fancy, fancy wheels, these spokes have to be on there.


Ultimately, a quality road wheel will boil down to four spoke choices.  2.0/1.8mm butted, 2.0/1.5mm butted, 2.0/1.7/1.8 DT Supercomp butted, or the pricey bladed CX-Ray/Aerolites.


Yes -- I know, I'm leaving out a huge amount of really interesting spokes like Sapim's new D-Light and Force spokes, as well as a huge chunk of DT Swiss' cool offerings including the Alpine III.  Those spokes are either too new or not generally available so I didn't bother mentioning them.

For spoke nipples, there's really only two choices, and it's between the materials, brass vs aluminum.  Brass spoke nipples are heavier (about 30g for a 32 spoke wheel) but are much stronger and corrosion resistant.  Aluminum spoke nipples weigh in around 10g for a 32 spoke wheel, so save up to 20g over brass nipples (about 2/3rds of an ounce) and are not as strong.  However, there's an easy solution for this which I've been using successfully for a while now.  By simply using spokes that are slightly longer than the recommended size, the spoke protrudes through the nipple head, slightly strengthening the spoke nipple at its weakest point -- the junction from the body to the head.  Both are valid choices, and have their place.  I prefer DT spoke nipples to the Sapims, (I find the quality to be higher) but have built with either.  Luckily, the threads are the same between manufacturers, so I have often mixed Sapim spokes with DT spoke nipples.  It's a great combo.  One nice perk of aluminum nipples is they are available in a range of anodized colors, like red, green, blue, gold, purple, and so forth.  Brass is usually only available in silver and black, although you'd be surprised at the results of silver brass and a colored Sharpie.  (yes, really, and no, it doesn't last.)

Rim choices

Building a good road wheel, you've got several choices to make.  First, let's take a look at some of the good rim choices available.

First and foremost is the offerings from Stan's NoTubes.  I'm a huge fan of Stan's products, and every MTB wheel we own has Stan's rims.  Being on a team that's sponsored helps, but I'd want to do it even if we weren't.  They now have two road options available, and they're looking to be every bit as good as the MTB offerings.  Their first road rim, the Alpha 340, has been redesigned and beefed up a little bit, and now comes in at around 380g, which is damn light for a road rim.  Their new rim, the Alpha 400, shares the same outer profile, but has reinforcing ribs which increase rim strength and durability and bumps the weight up to 425g, right in the same arena as the venerable Mavic OpenPro.  Stan's rims are designed to be easily compatible with road tubeless, and also incorporate a lower bead hook which slightly increases tire volume and decreases the risk of pinch flatting.  One thing I've noticed with Stan's rims is it is far, far easier to install and remove tires, thanks to the lower bead hook.  I also rode a set in a configuration I would have expected to be not quite stiff enough for me, and was very surprised at how stiff and responsive they felt.  I'm a big, big fan of the Stan's stuff, but the downside is their price, coming in at $120 each.  Still, they're probably my favorite choice for a road rim right now.  Some folks do take issue with the fairly sizeable decals on the rims, but decals can always be peeled off.

Next up is the KinLin rim line.  These are Taiwanese rims, but are made of a high quality aluminum alloy which keeps the weight low.  I've built several wheelsets with these rims, and they've always been nice and straight and easy to work with.  There's plenty of positive reviews available online, these rims are the real deal.  From the KinLin range, the two most popular are the XR-270 and the XR-300.  Both are an aero-profile, with the 270 being 27mm deep and the 300 being ever so slightly deeper at 30mm.  The weights are respectable, at 445g and 465g, respectively.  Heavier than the Stan's, but also a deeper V-shaped "aero" profile.  Does it make a real difference, aerodynamically?  I have no idea.  What really sets these two rims apart, however, is their price, coming in right around $40 each.  Very few quality rims can be had in that price range.  KinLin has other rims, but these are the two I'm familiar with and have built with.  As far as I'm concerned, none of the other rims offer as much as these two.

That's the two major choices I'd list.  Of course there are other major manufacturers out there.  Mavic, with their ubiquitous Open Pro rim, can't be left out, but I think the design is starting to show its age and really doesn't stand up to the other options I've listed.  Velocity makes a bunch of different rims, but I've built with them before and have never been really blown away.

7/27/12: Quick update after some more research and thought on the matter.  I think my treatment of Mavic was a bit harsh.  Yes, the Open Pro rim design is a bit dated, but it hasn't changed because it doesn't much need to.  I've got a set that I bought in 2000 built with Dura Ace hubs and 3x DT Champion spokes which has been utterly flawless.  It's really hard to beat the long-term performance of that setup.  It's not real fancy, it's not real light, but it is solid.

Also, I completely skipped DT Swiss rims.  I've only had the opportunity to build with one DT rim, but from what I've seen, their quality is extremely high (as I would expect from their spokes, nipples, and hubs) and they're also a great choice for a wheelset that emphasizes durability and strength.

Thursday, April 26, 2012

A nice, cheap alternative for bike GPS use.

I've become a big, big fan of the Strava ride logging site.  When bike GPS first came out, I was a big fan, and bought in with a Garmin Edge 305, and used it religiously for a while.  But, after a while, it dawned on me that all I was getting for all that datalogging wasn't much more than I could have done with a typical bike computer and a mapping site like "MapMyRide" or "Bikely".  Sure, I got neat little graphs of my speed and heart rate and cadence, but unless I did the same exact ride, it was almost impossible to compare my times and see some progress.  What I really wanted, and spent a bit of time looking for was something that would allow me to see my times on a certain segment, like, say, Tohickon Hill Road.  I couldn't find anything, so the usefulness of GPS logging lost its appeal to me, and I stopped using it as much.
A couple years later, I find out about this new site, "Strava".  Oh, goodie, another GPS logging service.  Well, here's what makes them special -- they have actually implemented the segment matching I was dreaming of all those years ago, and not only can you compare your times against yourself... you can compare against everyone else who's ridden there.  WHOA.  That's cool.

So I get into it again, religiously logging my rides, uploading as soon as I get home so I can see if I have any new KOMs, and go back through all my long-forgotten Garmin Connect rides so I can import them into Strava, because who knows -- I might have had a KOM long before I knew what those were!  At first I'm using my phone, but I quickly start looking at the newest Garmin offerings.  I'm a little tenative about that, because my old Edge 305 wasn't exactly problem free.  After the warranty expired, I had to send it back to them for a fix to the tune of $90.  I forgot what was broken, but not too long after, it wasn't finding satellites anymore.  I tried several things, then gave up and sold it to a buddy for a song.  (amusingly enough, he did manage to get it working)

But, I then had the great idea, and found Grace's old Motorola Cliq (MB200) phone, her first smart phone.  I loaded that up with MyTracks, and started testing it out.  Turns out, it works really well.  I tried the Strava app, but had some problems with that, so have been sticking with MyTracks, which is made by the Google team.  (I worked with the Strava support folks on the issues I was having with the Cliq, but since MyTracks worked and the Cliq is an older phone, I didn't push the issue.)

So, before you go out and spend at least $150 on even the most inexpensive Garmin, or the fancy new Motorola that does MP3s as well, consider getting an old, used Android smart phone.  You might just wind up with something far cheaper which has far more features.

  • A phone can have a very accurate GPS, especially with MyTracks, which allows you to modify the logging settings.  Nothing short of the ultra-expensive Garmin Edge 800 allows you to do that.
  • If you don't like the interface of the MyTracks app, you can run the Strava app.  Or Velox.  Or a large number of other alternate apps.  With a Garmin, you're stuck with the interface they give you.
  • In my comparison with logged rides in Nockamixon, my old Cliq with accuracy turned up has logged closer to the state-created trail maps (created with, I'm told, a $20k trail mapping GPS) than anything shy of a Garmin Edge 800, a $450 computer.  Better than an Edge 500.
  • A phone has support for wifi, so if you use the Strava app, as soon as you have access to a wifi signal, you can upload your ride automatically.  However, I use MyTracks as it's more stable and precise, so I export to GPX and email the ride on wireless.
  • Motorola's bragging about the MotoACTV having MP3 support.  Even old phones support MP3, OGG, and several other video formats, as well as having the ability to play videos.
  • Most Android apps work on an old phone.  No apps available for bike computers.  Might not be a huge consideration, but it can be pretty cool.
  • Without cell service, battery life is fairly fantastic.  I did a multi-hour ride and didn't even drop down to 50% battery with the Cliq.  If you had the display on, that would wear it down faster.
  • Most importantly, an old phone like the Cliq MB200 can be had for as little as $50-70 used. You might even have one on hand already.  It doesn't need to be unlocked, you don't need cell service.
Things to watch out for:
  • This is the biggest thing.  Some phones will NOT get a GPS signal without a data connection.  My old Motorola Droid X would not lock onto the GPS without data, no matter how long I let it sit.  I'm not sure the cause, but that renders it totally useless as a bike computer.  I've tried running it where I had a wifi signal at the beginning so it could get a lock, and then doing a ride, but the accuracy was pretty sad.  At this point, I can say that the Cliq and the original Motorola Droid both work without any data signal and make good bike computers.  The Droid X and the Galaxy Nexus both have issues getting GPS without data coverage.
  • My Cliq is really particular about getting sweat on the screen.  Whenever I've done that, it gets kinda mental, and won't respond right to touch until I pull the battery, clean the screen, and leave it alone for a while.  I'm wondering if maybe the phone itself is dying, as other phones I've had don't act up the same way.  Still, worth mentioning.
  • The Cliq does sometimes have some GPS madness where it doesn't follow the path too closely.  This ride has me riding through the middle of the lake, (pretty sure I didn't do that) but it was also before I tuned the precision in MyTracks.
  • Handlebar mounts for phones aren't quite as slick as mounts for bike GPS.  I got this ugly beast.  I don't understand the point of the ball socket, and can't seem to get it tight enough to hold a position.  Most of the time I just put it in my jersey pocket, although accuracy does seem slightly improved on the handlebars.  Some phones also might not like the level of vibration they'll see on handlebars.
  • Phones aren't waterproof.  Garmins are.  However, I've found that ziploc snack bags fit even the pretty large Galaxy Nexus with no problem, and are cheap.  I can still operate the touch screen through it, too.
So there you go, hopefully something to think about, and if you happen to have an old phone sitting around from after an upgrade, you might be able to give it a try!

Wednesday, April 25, 2012

Reviving the old dead blog

For some reason, I love to relive my rides after the fact.  So, I've decided to revive my old blog that I haven't done anything with for several years for that purpose.  I've already posted the hilarity that was my attempt at a full-speed lap of Nockamixon

Chasing the Nox full lap KOM

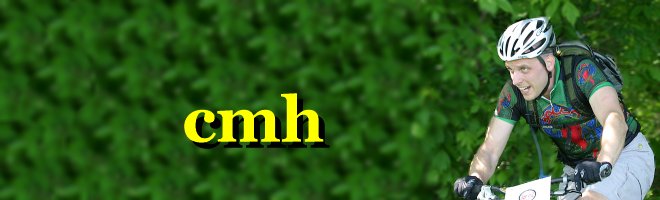
Last night I went out with the specific goal of giving my best go at Bob's ownership of the full Nox loop.

I had no expectations of coming in sub 50, much less challenging his time of 49 minutes dead -- but I figured I could put in something in the low 50s.

I started off with a lap of the Cold Spot loop backwards, to warm up and to check out the downed tree that Bob had warned me about.  Returned to the parking lot, talked to some guys, then headed out for my loop.  The downed tree wasn't too bad, had to get off the bike, hop the tree, and get back on, but I don't think I lost too much time.  On the northern Hammer loop, my phone starts going off.  There was an upgrade happening at work, and the notifications of stuff being unavailable started rolling in.  No big deal except I have my phone set up to keep notifying me until I actually look at the stuff.  Super.  So, I had to pull off my full-fingered glove, dig out the phone, unlock it, view the messages, lock the phone, and stick it back in my jersey.  This happened probably four or five times on the Hammer loop, all while I'm trying to maintain a race pace.  Looking at the results, it did affect my time -- my best there is 7:15, and this lap went down in 7:42.

I kept a steady pace on the connector trail, then got to the south loop.  Was going pretty well until I cut it a little too close to a tree, caught my jersey on the remnants of a branch, and had it quite literally ripped off my back.


Click the photo for more pics of my wrecked jersey.
This wouldn't have been much of a problem (except for it being my favorite jersey and favorite base layer) except two of my rear pockets ceased to exist, causing my phone, keys, and multi-tool to fly all over the place.  Had to stop, pick the chunk of jersey off the tree (now hanging in my cubicle) and pick up my stuff.  Then, I had to figure out where to put all this stuff, since I now had significantly less room to put it.  So, I tried what seemed like the best idea... tucked the stuff into the legs of my knickers.  I spent a bit more time looking for my second set of keys, but couldn't remember if I left them behind at the car or not, so I gave up the search for them so I could keep riding.  (more on those keys later)

Well, the legs of my knickers wasn't such a good spot.  As I pedalled, the stuff would migrate down, eventually heading for the spot behind my knee.  I managed to get the phone stuffed into my last remaining pocket once I realized it was still usable, but fought the multi-tool and keys for the remainder of the south loop, all while trying to maintain a "race pace".

Got to the end of the south loop, and had to take a moment to relocate my keys and multi-tool to my already overstuffed seat bag (yes, the one that looks like a racoon) because I wanted a good run on the Eastern Woods northbound trail.  See, a couple days ago I made a run at that trail with two phones recording.  (I've had some issues with great rides getting "lost" due to the GPS getting mental, so now run a backup) At the end of the day, one recorded a time of 5:32, and the other recorded a time of 5:56.  So I was either well faster than Bob on that segment, or two seconds behind.  That's a pretty big gap, so I had to go back and do it again.  I figured if I could do at least a 5:4x time, then my 5:32 was legit. (that phone typically is far more accurate, too)  So, I wanted to have a good run on there.

Well, it was a little wet, but most of the trails were solid.  A handful of spots which were a little slick, but nothing too bad.  My time was slower, but not massively slower, so when I came in with a 6:04 time, I realized my 5:32 was bullshit. Too bad, but beating Bob by 20 seconds anywhere smelled far too much like bullshit, no matter how much I wanted to believe it.  On the upside, his 5:54 is only 2 seconds faster than I've gone, so I can get that.  Will it happen before he's in the 5:40s?  we'll see.

I finished up with the Haycock Run uphill, on which, only an hour or two before -- Bob set the new KOM... and came in only a little bit behind at 2:15 to his 2:09.  Weird that I run that section faster uphill than down.  I think a sub 2 is possible.

So, I was a little disappointed with a 57 minute time, but at least I came in sub 1 hour, and considering my two stops and having to check my phone, it's not too bad.  I figure it would have been a solid 54 minute run, maaaaybe 53 minutes.  Dry trails and luck, I might be able to drop it to 52 minutes.  So Bob's time is pretty much unchallenged, thanks in no small part to his phenomenal bike handling.  The one time I rode with him, I went from right on his wheel to 50-60 feet back in the span of a couple tight downhill S-turns.  That shit just adds up.

All in all, though, it was a fantastic ride.  It's not often I just focus on going hard for an entire MTB ride like that, and the challenge is so much fun.  Thanks to Bob for giving me something to shoot for!  I will get to a 49 minute lap, but I'm pretty sure Bob will be sub 45 by that point. :D


Oh, and I mentioned the second set of keys.  Got back to the car, gave a good search, and discovered that set of keys was not in the car.  So, that meant I did have them, and they were still laying trailside by that tree.  So, I loaded up the bike, and headed for South Park Rd, where you can park on the side of the road and access the trails.  As you can see here, the trail gets really close to South Park Rd, climbs up for a while, then drops back down, getting very close to the trail you just rode.  I took advantage of this, rode cross-country between the two chunks of trail, and got back to the scene of the crime.  Using the light on my phone (it's past sundown and I'm losing light fast) I managed to find my keys about six feet down the trail from the tree.

Monday, August 10, 2009

My Review of Flashpoint High-Grade Alloy Bicycle Bracket for 31.8mm Handlebars, Allows the Mounting of Ballheads

Adorama

Flashpoint High-Grade Alloy Bicycle Bracket for 31.8mm Handlebars, Allows the Mounting of Ballheads

Nice design but transfers too much shake

cmh Doylestown, PA 8/10/2009

3 5

Pros: Lightweight

Best Uses: Casual riding

Describe Yourself: Photo Enthusiast

First and foremost, Adorama says you need a ball head to use this. You do NOT need a ball head. It can help and make the mount more flexible, but it is NOT necessary, as the mount comes with both a 1/4" and 3/8" thread. If you're just going to mount the camera pointed forward, you can save the money and skip the ball head.

I came across this camera mount on Adorama, and looked at it for a while before deciding to buy it. My plan was to use it to mount my Canon SD800 (small point-and-shoot) and shoot video. When I got it, I was impressed with the build quality, it does not look cheap at all, and the hardware is quality. Installation is very easy.

The problem, however, is the same with a ball head or without. At moderate speeds, the camera works very well, with only moderate shake, as can be seen in the following short video: http://www.youtube.com/watch?v=2wHd3yhPFJU

However, on the mountain bike (with front suspension) or on the road bike (carbon fiber frame and fork) once you start reaching any type of "interesting" speeds, the vibration is such that my camera winds up shutting itself off, and even if the camera was recording at the time, the file that was recording is lost.

For example, I rode a course at casual speeds, and got 10 minutes of good quality footage. During a race on the same trails, however, I got nothing, because the higher speed and sharper bumps caused the camera to shut off. On the road bike, I could cruise around town, but when I headed for a high-speed downhill, it would shut off soon after I started.

It is possible that other cameras would have better results, if they are more resistant to vibration. Understand - I'm not talking about the shake reduction feature in the camera (the SD800 has this) - I'm talking about being bolted to your handlebars and shaken pretty hard.

For cruising around the beach, a casual bike trip, or really smooth roads, it'll probably work pretty well, but for anything more interesting, you'll have to look elsewhere.

For my use, though, I'm saving up for a proper sports camera.

Mounted on mountain bike.

thumbnail

: Picture of Product

Short test video using the mount

: Mountain, Handlebar, Using Product, Road, Doylestown, MTB, Flashpoint, Mount, Bike

()

Sunday, January 18, 2009

Ah, the pure, simple joy of singlespeeding.

A while back, while riding in Pennypack park, the gears on my Superlight were acting up. I wound up having to stay in one gear, and did the rest of the ride as a singlespeed. Despite having tried -- and intensely disliked -- singlespeeding in the past, I found myself enjoying it and for the first time, starting to "get" the appeal. I decided to ressurect my Karate Monkey as a singlespeed.

A little while later, I had it back together, and took it out for its inaugural ride, again in Pennypack. (it's one of the best parks in the area for singlespeeding) On that first ride, the bike worked well, but I lost my front brake -- apparently the Marta needed bleeding -- bad. Initially I had some front brake if I pumped the lever, but that went away and I was left with nothing. Managed to finish the ride with only the rear.

So, I pulled off the Martas, and set up my Avid mechanical brakes. No bleeding to be done there, plus they're good brakes. Set them up, and while I was at it, converted the Panaracer Rampages to tubeless using some spare Stan's strips I had on hand. On the next ride, the brakes were great, but I burped the rear tire and lost all the pressure. (turns out the 26er Stan's strips are just a little too narrow for the Salsa Delgado Cross rims) Thankfully Amy had some CO2 so I was able to re-seat the bead and finish the ride.

Bought some proper Stan's 29er strips, which are just that little bit wider, and fixed my rear wheel. Yesterday, I got out to try that, and had no problems with the brakes or tires. But, it was cold - wicked cold - in the single digits. A little ways into the ride, the freehub started to slip, eventually giving out altogether. The grease in the freehub had frozen up, keeping the pawls from moving freely, and they were either damaged, or just plain froze in place. Thankfully there was a paved path so I could head straight back to the car, but without the ability to pedal on my own, I had to rely on getting a tow from Lance and Aaron.

I've been enjoying singlespeeding, and been having good rides, but yeesh! I thought singlespeeds were supposed to be simple, and maintenance free! :D

Wednesday, October 22, 2008

I wanna ride.

After the past two mountain bike rides being so much fun, I really want to get back on the bike, and ride! However, right now I'm really only able to get out on Fridays, so I'm left for the rest of the week doing nothing but wishing I was riding.

I think it might be time to get the rollers out. I'm not a fan of riding them, but with less and less opportunities to ride, I have to do something to keep strong so the Friday rides are still fun.

Friday, October 17, 2008

I just don't understand.

Went riding with Grace, Amy, and Ed today, and rode Pennypack -- my first time, finally!

Had shifting issues in Wissahickon last week, spent some time on the bike yesterday but apparently not enough -- had shifting issues again today. So, I wound up singlespeeding on the santa cruz- I found one gear in which I could leave it where it wouldn't skip shift on me, or anything.

Well, I spent most of the ride doing the singlespeed thing, and really wondering just WHY some folks do this on PURPOSE. It's not enough gear on the downhills, it's too much gear on the uphills, it's just too much work and so forth and so on.

However, what I REALLY didn't understand was how, after going through a tough ride like that (and having to work so much harder for the same ride than I would have if my gears were working) I came to the conclusion that no, I was not going to sell my Karate Monkey as I planned, but rather build it up again... as a rigid singlespeed.

It makes no bloody sense whatsoever... but I'm still gonna do it. Hey, I might build it up and realize I still don't like it. But, for some reason that I still don't fully understand, I'm gonna go back and try it again.

Sunday, October 12, 2008

Cheap bike parts and more MTBing

Saturday morning, Dmitri, Lance, and I went up to the bike swap meet at the Lehigh Valley velodrome. (now called the "Valley Preferred Cycling Center") I brought a bunch of cash, not looking for anything particular past a set of cranks for the road bike. The Dura Ace cranks on the Giant are starting to look pretty rough, with the clear coat starting to crack, and the aluminum oxidizing. They're good cranks, but need to be refinished, and I know a guy who restores bikes who is interested in seeing what he can do with them. (or, I might try my hand at it)

So, early on, I found a pair of Ultegra external bearing cranks for only $75. Was pretty happy with that and bought them, but later realized I didn't bother to consider they didn't have a bottom bracket, and I also discovered they were missing the plastic tensioning cap as well as one of the clamping bolts. So, the price wasn't quite as good as I thought. Oh well, my bad.

Just two booths later, I found a pair of FSA SL-K carbon fiber road cranks which looked to be take-offs - they showed some scratches but no wear on the rings, and no evidence of pedals ever having been installed - for $90! Right now those same cranks are $450 - on sale - at Colorado Cyclist! That lessened the pain of my hasty purchase on the Ultegras!

After the swap meet, the three of us rode in Ralph Stover/High Rocks park. It's a small park, but very technical, so it's a challenging ride. I didn't ride nearly as well as Friday night's ride, but did decently. Both Lance and Dmitri rode strong, and Dmitri rode some really tough sections -- including one section that Lance tried multiple times without success! (I walked the whole thing)

We then went home, picked up four cases of beer, threw a couple beers in the freezer and worked on Lance's bike.

All in all, I'd call that a Very Good Day. :)

Friday, October 10, 2008

Great ride in Wissahickon

Tonight I got out of work and joined Grace, Amy, Ed, and Dmitri for a ride in Wissahickon. This will have to go down as the best MTB ride I've been on in over a year. We were all riding strong, and riding fast. Had we not lost light, we probably would have kept going, but since only Dmitri had a light, we bailed as it got harder and harder to see the trail.

My back started hurting a little bit at one point, but cleared up. This was also the first time that I felt the power I have on the road available to me on the mountain. Even at that, though, trying to keep up with Dmitri and Grace towards the end had me working, and working HARD. They've both gone and gotten seriously fast! (thank you, Amy!!) Towards the end of the ride, Ed was having problems with his back (oh how I can relate) but somehow still managed to be crazy fast.

Afterwards, Grace and I joined Ed and Amy at a bar in Glenside for beer and wings. Between the four of us, we ordered 100 wings and untold numbers of beers. Much fun was had, and although there were wings left over when we were all full, it wasn't as much as you might think! We all toasted to Amy and Grace... they've become good friends and have made each other far stronger than they had been before.

I just hope that ride is an indication of what's to come for me. Despite what Grace will make you think, I don't hate mountain biking -- when it's that good, I really, really love it!

Tuesday, October 7, 2008

Gentlemen's Rides

Back on September 27th and 28th, I did the MS150 City-to-Shore fundraising bike event. I haven't written about it here because I wanted to do it when I had time to really do it justice... to tell all the stories that there were, the fun had with friends, the new friends met, the great riding that we did... but really you don't care about those stories nearly as much as I do.

I just came across this article about "Gentlemen's Rides" which so perfectly sums up not only the MS150, but all of my most favorite rides. Gentlemen's Rides are like racing, except it's far more social. There's still the urge to put your closest friends into the most hurtin' possible, but then you regroup, laugh, and do it again.

I always knew I wasn't a racer... but now I realize I'm a "Gentleman rider".

Sunday, September 21, 2008

Good riding in CT

Monica and Rich, Grace's sister and her husband, moved to CT a few months ago. I was concerned when I heard they were moving, because there was some *good* mountain biking in Greensboro, NC... but after visiting this weekend, I found my concerns were unfounded. They live just off of the Shenipsit trail, which despite the name which begs for variations, (sheep s**t, snippy s**t, conniption, etc) is pretty awesome. It's very technical, littered with rocks, and you really have to work for it, but it's amazingly fun.

I have to also say that the back issue seems to be completely resolved. I rode yesterday and today, and rode hard enough that I was totally wiped out at the end, but my back was fine. My back hurt a little when I was off the bike Saturday night, but was fine by Sunday and didn't bug me at all on Sunday's ride. I'm VERY happy to be done with that chapter.

We came across several other cyclists, and while thinking about it later, I realized nobody was riding a twenty-niner. Considering the rocky terrain, I was pretty surprised about this. In Wissahickon, niners are just about everywhere and taking over... and the rockiest sections of Wissahickon aren't anywhere near as tough as the average rock gardens on Shenipsit. Mind you, we only saw about 10-12 other cyclists while we were out, but the same selection of riders in our area would have netted at three or more niners.

Speaking of riders we met, we met up with a couple on the trails who were out riding with their dog. We asked about the trails, and they offered for us to ride with them since it was easier to show the trails than describe them. We gladly accepted and rode with them for a while. At one point when we stopped to regroup (and recover) and they mentioned that they are the president and webmaster for a local club, Eastern Bloc. Stuart and Laura were really cool and told us next time we come back to get in touch and we'll meet up to ride again! Gotta love the awesome people you meet while mountain biking!

I also had another first on this ride... I failed to clear a technical climb for a reason I had never thought I would use -- my arms gave out! As strange as it sounds, I realized several times while muscling through the rough stuff, I was REALLY cranking on the bars. On this one climb, I was slightly out of the saddle to give the bike more room to move over the ground, and to keep my position as well as push on the pedals harder, I was pulling back on the bars good and hard. My legs were fine, my lungs were fine, everything seemed good, but I realized that my arms were fatiguing from the effort, and had to stop before I lost my grip! Not having my gloves contributed, no doubt... my hands had gotten sweaty and the ESI grips had started to get a little slick after we started riding with Stuart and Laura.

I also should mention that all the riding Grace has been doing with Amy has been paying off bigtime. Grace has been riding VERY strong, and even having a hardtail with a road cassette didn't slow her down through the gnarly rock gardens. Returning to the house on a road climb, she dropped me like a bad habit. Yes, she's strong, and yes, I'm psyched!

Funny story about that... while we were riding with the Jensens, we were doing a prolonged technical climb, and the day's riding was starting to catch up with me. Stuart was starting to gap me up ahead, and I heard one of the ladies catching up to me. I took a quick glance back, and saw a green jersey, and thought it was Laura. She sat on my wheel for a while as I climbed, and at one point I offered to let her by. She declined, but was stuck to my wheel. I was fading, and figured if I couldn't clear a technical section, I'd get in her way. I considered telling her that it was okay to pass me, I didn't mind being passed by a woman -- since I wouldn't be able to ride with Grace if I did! Didn't actually say it (was gasping for breath anyway) and a little while later realized it wasn't Laura after all, but Grace sitting back there and apparently not even breathing hard!

Saturday, September 13, 2008

My big, crazy, pointless project...

Recently I've undertaken the project of rearranging my digital pictures. One of the things I've done is renamed them with the date and time code in the filename, so they sort in chronological order, even if the sequence numbering out of the camera is screwy. (like what happened when the numbers "rolled over" from IMG_9999.JPG to IMG_0001.JPG on our trip to Bend, OR)

Of course, in order to include date and time info, you really want to have the date and time info be right. Although I usually keep the time on my cameras set and adjusted properly, sometimes it can be a bit tricky, like when we took that trip to Bend, and I forgot to adjust for the change in time between EST and PST. In that case, I was able to use a picture of a sunset along with the sunset data from aa.usno.navy.gov to figure out the proper time adjustment, which I then applied to all the pictures before renaming.

What gets really complicated, though, is our trip to Tucson, AZ for a Western Spirit mountain biking trip. Not only do I have my own pictures from the trip, I also have pictures from four other people who were on the trip! So, now it's a real detective job to figure out who's got the right times and the ones who don't. I thought my times were right, but a sunset picture shows that I never adjusted my camera for MST. Another guy who took pictures at the same time has the times set at 2:23pm the next day! Yet another doesn't have pictures at that sunset, but in one picture, you can read the time on my watch and see he's off by two hours as well... which is appropriate since he runs a bike shop in Montauk. A third, well, I still haven't figured out exactly what the adjustment is on his, because he didn't take that many pictures, and the only overlap I have is with the guy whose pictures appear to be 20 hours off. The last guy? His camera didn't timestamp the EXIF information, and the file time info is useless, so I'm more or less on my own. (Thankfully he only shot 19 pictures, and there's pretty good overlap with the others, so I'll be able to fake the time info so they sort in the right general area.)

If that weren't bad enough, there's the question of -- if it's wrong on this picture, can I assume it's wrong throughout the vacation? Sometimes I remember a little late, and then I adjust the time while I'm out there. Most of the time, honestly, it doesn't matter if I'm off a couple hours in either direction, but when I'm trying to put together the work of five different photographers, it's another story.

Okay, yes, the really important part is I have the pictures themselves, and getting the time right really does not matter a hill of beans, but it's pretty cool to have a picture of Grace and I taken by Jim, right next to another picture at almost the same exact time, taken by Mark, of Jim taking our picture. Plus, when viewing the pictures, it's nice to see them in order, and not wind up jumping around.

To be perfectly honest, it's not an important project at all, but it is fun simply because it is such a challenge, and a learning opportunity. Hey, before I started this, I didn't know that the Navy provides a site that can tell you that on March 16th, 2006, the sun set at 6:32pm in Tucson, AZ, and civil twilight happens at 6:57pm. (nor did I know that "civil twilight" means the sun is 6 degrees below the horizon) It's also a fun challenge to look at different pictures from different cameras to try to correlate what's happening... and the fact that the pictures are of a great vacation with friends and bring back good memories just makes it even better.

Wednesday, September 10, 2008

Beaten with my own stick...

I got out for a ride yesterday with Dmitri, a buddy of mine who is a dedicated singlespeeding mountain biker. He's decided to ride the MS-150 with us at the end of the month, but he doesn't have a road bike, so I put my old Airborne Zeppelin together for him to use. Yesterday was his first ride on the bike in several years. Back in 2004 or 2005, both of us entered a local time trial, and he rode the Zep back then... but hasn't touched a road bike since.

Well, I have to say, it's pretty interesting to see my old bike fading away on up the road. Apparently the preparation for a 100 mile MTB endurance race translates well to the road, even if he wasn't familiar with this whole concept of shifting, and having to pedal all the time. On one stretch of road, I was holding about 20mph, and he comes around and starts pulling at a steady 24mph. Yikes! Thankfully I kept the climbing to a minimum, as otherwise the ass-whuppin' would have probably been worse.

The good part was that since we're about the same size, we were able to swap bikes so I could ride the old Zeppelin. Still a nice bike, but definitely different ride. Softer, yet more chattery than my carbon fiber Giant TCR. One thing I really liked, though, was the 46cm c-to-c bars. I've had the bars for a while, but hadn't gotten around to testing them. They're only 2cm wider than the Eastons on the Giant, but that little bit wider is noticable, especially when cranking out of the saddle. The extra leverage is really nice, and the flat tops of the bar is even wider. Of course, having the 31.8mm stem clamp area and being made of aluminum, they are also far stiffer than the carbon Eastons with the smaller 26.0mm clamp. Most bars only come to 44cm c-to-c, but if you're a big person, you might seriously consider looking for the wider 46cm bars. I'm considering getting rid of the two pairs of 44cm bars I have now and finding a carbon 46cm for the Giant.

Tuesday, September 9, 2008

My town is better than your town.

My town is better than your town.

What's my town? Doylestown, PA.

Why's my town better than your town? Is it because it's just a really cool place to live, and we can walk to all these great restaurants, and I can walk to the SEPTA train station to ride into the city? Well, that helps, but no, that's not why my town is better than your town.

My town is better than your town because we had one of the best pro bike races I've seen in a while. For the past two years, the second part of the Univest Grand Prix has been happening in Doylestown, but it was a low-key affair, with a simple, small rectangular course on side streets where it wouldn't bother too many people. This year, however, was different. This year, it was a REAL bike race, and there was TV coverage and everything. The course was expanded to cover more of Doylestown, had some really interesting corners, and actually encompassed the Arts and Crafts festival going on during the weekend.

The weather was beautiful, there was an incredible turnout for the race, and the race itself was pretty amazing. When there were only a couple of laps to go, we found a spot right on the rail and with each passing lap, the excitement level rose and rose. When the final sprint happened, everyone was going crazy and yelling and clapping and banging on the boards on the side of the course. I was surprised to see a McDonald's logo rolling across the line first - I can bet that nobody on that team actually eats the junk - but it was a solid victory and to a great race!

I brought my big camera to the event, and in the earlier laps, we walked around the course, with me stopping to take pictures whenever the racers went by. I'm definitely one to subscribe to the "shotgun" approach to photography, figuring if I shoot more, I'm likely to hit a good shot now and then, and Sunday was no different. I shot nearly 800 pictures, which I later narrowed down to around 500. I then weeded that down to my 21 favorites, which you can see in my gallery from the race. (or click any of the pix on this post)

It was just so awesome to see real professional cycling happening just a block from my house... and I hope that Univest keeps coming back!

Monday, September 1, 2008

Don't reinvent the wheel

I finally got around to installing the tubeless kit on my new road wheels. I watched the instructional video a couple times, then just followed his procedure exactly. The front tire wouldn't seat with the floor pump as it did in the video, so I just moved on to the rear, which seated quickly. Went back to the front, still wouldn't seat with the floor pump, so had to break out the air compressor.

All of my previous experience with tubeless conversions was with tires that weren't designed for tubeless use, so it was really nice when the tubeless Hutchinsons sealed up tight and didn't leak from the beads or sidewalls. I haven't had a chance to ride the new tires yet, but they held air perfectly overnight.

While I was doing the install, I realized something. Stan's recommendation for 2 oz of sealant in the road tires sure seemed like a bunch for such skinny tires, but he sure knows what he's doing, so I went with it. In the past couple of months, I've been experimenting with different things on the mountain tires, trying to come up with simpler or lighter solutions to the Stan's kits that we've been running for a while. Although I've had several instances of limited success, I keep going back to the basic Stan's kit when I want something that Just Plain Works.

What it boils down to is he's done all the work up front, and has come up with a great system which works without any major problems. Despite my best efforts to improve upon it, I keep coming back to use his stuff as designed. Although it can be frustrating to be unable to improve upon it, I've got to say, it's nice to see such well designed and implemented stuff available!

That said, some comments on the installation of the road kit for anyone who might be doing it:

  • Installing the yellow tape - watch very carefully as you do it to make sure that it's even, side to side. I had to redo the front wheel when I got around to the second layer and discovered parts of the first layer which weren't well centered. Take your time and make sure it's installed right.
  • He doesn't mention using a tubed tire to help seat the yellow tape in this video, but has in some of the MTB installation videos. I found it helped, but might not be absolutely necessary. It did help get the end of the yellow tape to stick fully, though.
  • He suggests using a round file to open the valve hole. I've tried making the hole with other methods, and a round file is by far the best. Just don't file into the rim... use it just enough to separate the excess yellow tape.
  • Mounting the tire - I managed to get the first bead installed by hand, but it's a REALLY strong bead, and I wasn't able to get anywhere near installing the second bead by hand. The video states "Okay to use tire levers" -- I can install almost any conventional tire by hand, but these tires were having nothing to do with it.
  • The space between the valve stem and rim is pretty tight, so make sure the bead is actually down in that space before you try to inflate.
Aside from the difficulty mounting the tire, and needing the air compressor to seat the beads on the front tire, the kit was wonderfully easy. Of course, we'll see if the ride is worth it, but if our experience running tubeless on the mountain bike is any indication, it will be. I don't run any tubes in the mountain bikes anymore!

Sunday, August 31, 2008

Knock, knock, knocking on bonkin's door...

Went out for the same ride as yesterday this morning. Felt pretty good, was happy with how I rode, but forgot one key item. I didn't have any solid food before I left. Wasn't a problem until about mile 34 or so, when it started becoming a major problem. At first I just started feeling very hungry, but by the time I was riding into Doylestown, I was starting to feel weak and by the time I got home, about all I could do was collapse in the driveway while Buddy ran around my head.

I didn't get to a full-fledged bonk, and after downing a pack of Clif Shot Bloks, then a big breakfast, I now feel almost human again. My time on the bike was marginally faster than yesterday's time... which is good considering I was in survival mode for the last three miles!

I've also discovered that on the prolonged flats, my cardio isn't the limiting factor. My legs, which have almost always been strong enough to deliver more power than my heart could keep up with, have been getting a slow burn, and that's turned out to be the limiting factor.