Next in the selection process in building good road wheels is the spokes and nipples.
First, let's talk brands. There are two major brands I deal with, DT Swiss and Sapim. The spokes between the two are very similar, and I've built with many of both. I don't have a specific preference between the two in a similar spoke. There is also Wheelsmith, but I have not done as much with them for the simple reason that they don't seem to be as prevalent. I've got nothing against them otherwise.
As for the spokes themselves, there are three major types, straight gauge, butted, and bladed.
First is straight gauge. That means that the spoke remains the same diameter from one end to the other. These really only have a place in cheap wheels. You don't want cheap wheels, so forget about straight gauge spokes. (They are also good if you're building your first set of wheels as they are much easier to work with when the wheel is up to tension)
Next is butted spokes. Most typically, butted spokes are thinner in the middle to save weight, but this design also allows more elasticity in the spoke, resulting in an overall stronger spoke. Some examples of butted spokes are the DT Competition and Sapim Race with 2.0mm ends and a 1.8mm center section. Coming in lighter are the DT Revolution and Sapim Lasers with 2.0mm ends and a 1.5mm center. These have less material in the middle and so save even more weight, but they can be hard to build with as they really, really like to twist as they're tightened. (I've got my tricks to deal with that) Two other spokes worth mentioning are the DT Supercomps, with 2.0mm at the J bend, 1.7mm in the center, and 1.8mm at the nipple end. The center is slightly smaller than the 2.0/1.8mm spokes, and the narrower nipple end allows for a stronger spoke nipple. These are great spokes, and I've built with them. Lastly is the Sapim Strong, a spoke with a 2.3mm J bend, then a straight 2.0mm section all the way to the nipple end. These are designed for really heavy duty wheels, like big guys, tandems, or loaded touring. I've not had the need to build with these yet. For most folks, I'd suggest the 2.0/1.8mm or the 2.0/1.5mm if you want to save weight and your wheelbuilder can handle it.
(you'll see terms like "single butted", "double butted", and even "triple butted". I just go with "butted" and list the diameters. Life's easier that way)
Finally, we've got bladed spokes. The ones we're interested in are normal round spokes which have been flattened out to an oval profile to give an "aero" shape, one that's thin side-to-side (towards the wind) but longer front-to-back. There are many varieties of bladed spokes, but for our purposes, we'll only consider one -- the Sapim CX-Ray or DT Aerolite, which share major specs. Both start with a 2.0/1.5mm butted spoke, and are then ovalized into a 0.9x2.3mm cross section. The key here is that the hubs don't need to be modified like they would with other types of bladed spokes, and that's why these are the only ones that we'll consider. These spokes are pretty amazing, since their weight is about as light as you can get, but due to the reshaping, they are strengthened, and have significantly improved fatigue limits. So, they can make for a light, strong, aero wheelset. Sounds awesome, doesn't it? Well, they kinda are. Awesome has a price, though -- these spokes are usually at least $2.50 each. That adds up quickly in a wheel, especially when good butted spokes can be had for as little as $0.75 each. Still, if you want fancy, fancy wheels, these spokes have to be on there.
Ultimately, a quality road wheel will boil down to four spoke choices. 2.0/1.8mm butted, 2.0/1.5mm butted, 2.0/1.7/1.8 DT Supercomp butted, or the pricey bladed CX-Ray/Aerolites.
Yes -- I know, I'm leaving out a huge amount of really interesting spokes like Sapim's new D-Light and Force spokes, as well as a huge chunk of DT Swiss' cool offerings including the Alpine III. Those spokes are either too new or not generally available so I didn't bother mentioning them.
For spoke nipples, there's really only two choices, and it's between the materials, brass vs aluminum. Brass spoke nipples are heavier (about 30g for a 32 spoke wheel) but are much stronger and corrosion resistant. Aluminum spoke nipples weigh in around 10g for a 32 spoke wheel, so save up to 20g over brass nipples (about 2/3rds of an ounce) and are not as strong. However, there's an easy solution for this which I've been using successfully for a while now. By simply using spokes that are slightly longer than the recommended size, the spoke protrudes through the nipple head, slightly strengthening the spoke nipple at its weakest point -- the junction from the body to the head. Both are valid choices, and have their place. I prefer DT spoke nipples to the Sapims, (I find the quality to be higher) but have built with either. Luckily, the threads are the same between manufacturers, so I have often mixed Sapim spokes with DT spoke nipples. It's a great combo. One nice perk of aluminum nipples is they are available in a range of anodized colors, like red, green, blue, gold, purple, and so forth. Brass is usually only available in silver and black, although you'd be surprised at the results of silver brass and a colored Sharpie. (yes, really, and no, it doesn't last.)
Showing posts with label wrenching. Show all posts
Showing posts with label wrenching. Show all posts
Wednesday, July 25, 2012
Rim choices
Building a good road wheel, you've got several choices to make. First, let's take a look at some of the good rim choices available.
First and foremost is the offerings from Stan's NoTubes. I'm a huge fan of Stan's products, and every MTB wheel we own has Stan's rims. Being on a team that's sponsored helps, but I'd want to do it even if we weren't. They now have two road options available, and they're looking to be every bit as good as the MTB offerings. Their first road rim, the Alpha 340, has been redesigned and beefed up a little bit, and now comes in at around 380g, which is damn light for a road rim. Their new rim, the Alpha 400, shares the same outer profile, but has reinforcing ribs which increase rim strength and durability and bumps the weight up to 425g, right in the same arena as the venerable Mavic OpenPro. Stan's rims are designed to be easily compatible with road tubeless, and also incorporate a lower bead hook which slightly increases tire volume and decreases the risk of pinch flatting. One thing I've noticed with Stan's rims is it is far, far easier to install and remove tires, thanks to the lower bead hook. I also rode a set in a configuration I would have expected to be not quite stiff enough for me, and was very surprised at how stiff and responsive they felt. I'm a big, big fan of the Stan's stuff, but the downside is their price, coming in at $120 each. Still, they're probably my favorite choice for a road rim right now. Some folks do take issue with the fairly sizeable decals on the rims, but decals can always be peeled off.
Next up is the KinLin rim line. These are Taiwanese rims, but are made of a high quality aluminum alloy which keeps the weight low. I've built several wheelsets with these rims, and they've always been nice and straight and easy to work with. There's plenty of positive reviews available online, these rims are the real deal. From the KinLin range, the two most popular are the XR-270 and the XR-300. Both are an aero-profile, with the 270 being 27mm deep and the 300 being ever so slightly deeper at 30mm. The weights are respectable, at 445g and 465g, respectively. Heavier than the Stan's, but also a deeper V-shaped "aero" profile. Does it make a real difference, aerodynamically? I have no idea. What really sets these two rims apart, however, is their price, coming in right around $40 each. Very few quality rims can be had in that price range. KinLin has other rims, but these are the two I'm familiar with and have built with. As far as I'm concerned, none of the other rims offer as much as these two.
That's the two major choices I'd list. Of course there are other major manufacturers out there. Mavic, with their ubiquitous Open Pro rim, can't be left out, but I think the design is starting to show its age and really doesn't stand up to the other options I've listed. Velocity makes a bunch of different rims, but I've built with them before and have never been really blown away.
7/27/12: Quick update after some more research and thought on the matter. I think my treatment of Mavic was a bit harsh. Yes, the Open Pro rim design is a bit dated, but it hasn't changed because it doesn't much need to. I've got a set that I bought in 2000 built with Dura Ace hubs and 3x DT Champion spokes which has been utterly flawless. It's really hard to beat the long-term performance of that setup. It's not real fancy, it's not real light, but it is solid.
Also, I completely skipped DT Swiss rims. I've only had the opportunity to build with one DT rim, but from what I've seen, their quality is extremely high (as I would expect from their spokes, nipples, and hubs) and they're also a great choice for a wheelset that emphasizes durability and strength.
Sunday, October 12, 2008
Cheap bike parts and more MTBing
Saturday morning, Dmitri, Lance, and I went up to the bike swap meet at the Lehigh Valley velodrome. (now called the "Valley Preferred Cycling Center") I brought a bunch of cash, not looking for anything particular past a set of cranks for the road bike. The Dura Ace cranks on the Giant are starting to look pretty rough, with the clear coat starting to crack, and the aluminum oxidizing. They're good cranks, but need to be refinished, and I know a guy who restores bikes who is interested in seeing what he can do with them. (or, I might try my hand at it)
So, early on, I found a pair of Ultegra external bearing cranks for only $75. Was pretty happy with that and bought them, but later realized I didn't bother to consider they didn't have a bottom bracket, and I also discovered they were missing the plastic tensioning cap as well as one of the clamping bolts. So, the price wasn't quite as good as I thought. Oh well, my bad.
Just two booths later, I found a pair of FSA SL-K carbon fiber road cranks which looked to be take-offs - they showed some scratches but no wear on the rings, and no evidence of pedals ever having been installed - for $90! Right now those same cranks are $450 - on sale - at Colorado Cyclist! That lessened the pain of my hasty purchase on the Ultegras!
After the swap meet, the three of us rode in Ralph Stover/High Rocks park. It's a small park, but very technical, so it's a challenging ride. I didn't ride nearly as well as Friday night's ride, but did decently. Both Lance and Dmitri rode strong, and Dmitri rode some really tough sections -- including one section that Lance tried multiple times without success! (I walked the whole thing)
We then went home, picked up four cases of beer, threw a couple beers in the freezer and worked on Lance's bike.
All in all, I'd call that a Very Good Day. :)
Monday, September 1, 2008
Don't reinvent the wheel
I finally got around to installing the tubeless kit on my new road wheels. I watched the instructional video a couple times, then just followed his procedure exactly. The front tire wouldn't seat with the floor pump as it did in the video, so I just moved on to the rear, which seated quickly. Went back to the front, still wouldn't seat with the floor pump, so had to break out the air compressor.
All of my previous experience with tubeless conversions was with tires that weren't designed for tubeless use, so it was really nice when the tubeless Hutchinsons sealed up tight and didn't leak from the beads or sidewalls. I haven't had a chance to ride the new tires yet, but they held air perfectly overnight.
While I was doing the install, I realized something. Stan's recommendation for 2 oz of sealant in the road tires sure seemed like a bunch for such skinny tires, but he sure knows what he's doing, so I went with it. In the past couple of months, I've been experimenting with different things on the mountain tires, trying to come up with simpler or lighter solutions to the Stan's kits that we've been running for a while. Although I've had several instances of limited success, I keep going back to the basic Stan's kit when I want something that Just Plain Works.
What it boils down to is he's done all the work up front, and has come up with a great system which works without any major problems. Despite my best efforts to improve upon it, I keep coming back to use his stuff as designed. Although it can be frustrating to be unable to improve upon it, I've got to say, it's nice to see such well designed and implemented stuff available!
That said, some comments on the installation of the road kit for anyone who might be doing it:
- Installing the yellow tape - watch very carefully as you do it to make sure that it's even, side to side. I had to redo the front wheel when I got around to the second layer and discovered parts of the first layer which weren't well centered. Take your time and make sure it's installed right.
- He doesn't mention using a tubed tire to help seat the yellow tape in this video, but has in some of the MTB installation videos. I found it helped, but might not be absolutely necessary. It did help get the end of the yellow tape to stick fully, though.
- He suggests using a round file to open the valve hole. I've tried making the hole with other methods, and a round file is by far the best. Just don't file into the rim... use it just enough to separate the excess yellow tape.
- Mounting the tire - I managed to get the first bead installed by hand, but it's a REALLY strong bead, and I wasn't able to get anywhere near installing the second bead by hand. The video states "Okay to use tire levers" -- I can install almost any conventional tire by hand, but these tires were having nothing to do with it.
- The space between the valve stem and rim is pretty tight, so make sure the bead is actually down in that space before you try to inflate.
Wednesday, August 27, 2008
Not quite as good
Spent last night working on the new rear wheel. Was the same setup as the previous day, but this wheel decided it was really going to fight me and avoid getting both true and tension balanced. Finally got it to where I was content with the results, but it was definitely one of the tougher wheel build/tensionings I've dealt with! I had hoped to finish that one quick so I could also finish some other wheels I've been wanting to work on, but was unable.
Still, I got it to work, and the wheelset is gorgeous. All said and done, the wheelset comes in at 1478g, (642g front, 835g rear) which is really light, even moreso when you consider it's a deep section aluminum rim!
Tonight I'm hoping to put the Stan's tubeless rim strip on it, and I'll mount my Michelin Pro 2 Race's with a tube to seat the tape. Hopefully I'll get a chance to ride it, then, tomorrow, I should be ready to do the proper tubeless conversion!
Monday, August 25, 2008
This is the good stuff...
After thinking about it, nay -- dreaming about it -- for a year and a half, at least, I've finally gone and ordered the parts for a really, really slick set of wheels for my road bike. 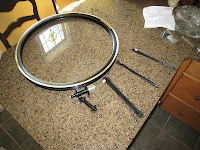 I have an older set of American Classic hubs (no, they weren't subject to the recall) with Sapim CX-Ray spokes and Speedcific Niobium 30 aero rims. If that means nothing to you, trust me when I say that this makes for an utterly swanktastique wheelset. CX-Ray spokes are over $2 - EACH. (and that was a really good price) They're an ultra-lightweight spoke that's formed into an aerodynamic blade, and this process actually makes them tremendously strong... so strong that they've been used in downhill mountain bike wheels. That's the last place you'd expect to find ultra-lightweight spokes!
The Speedcific Niobium 30 rims are a deeper aero section rim made with an aluminum alloy that uses Niobium to make it far stronger than normal aluminum, so it can be used to make surprisingly light rims. For most aero section rims, we'd be talking about over 500g each, but these were 457g and 443g!
Blah, blah, blah, words, words, numbers, words! Forgive me, I like this stuff... so I like to talk about it. The ultimate result is a light wheelset which will still be quite aerodynamic and strong.
The best part about it is that since I had the hubs, and bought the rest of the parts from Mike Garcia of Odds and Endos and now Speedcific fame... that means I have to build the wheels myself. Considering that's one of my favorite things, it makes the whole project even better!
 Tonight, I got home at about 5:30pm, got to work on the wheels, and now it's after 9pm, the front wheel is done, and the rear is coming together. I really took my time building up this set, and hope it shows when they finally hit the road. Of course there are other things that I really should be doing with that time, but I enjoy this far too much to go and waste my time being responsible. :)
 I have an older set of American Classic hubs (no, they weren't subject to the recall) with Sapim CX-Ray spokes and Speedcific Niobium 30 aero rims. If that means nothing to you, trust me when I say that this makes for an utterly swanktastique wheelset. CX-Ray spokes are over $2 - EACH. (and that was a really good price) They're an ultra-lightweight spoke that's formed into an aerodynamic blade, and this process actually makes them tremendously strong... so strong that they've been used in downhill mountain bike wheels. That's the last place you'd expect to find ultra-lightweight spokes!
The Speedcific Niobium 30 rims are a deeper aero section rim made with an aluminum alloy that uses Niobium to make it far stronger than normal aluminum, so it can be used to make surprisingly light rims. For most aero section rims, we'd be talking about over 500g each, but these were 457g and 443g!
Blah, blah, blah, words, words, numbers, words! Forgive me, I like this stuff... so I like to talk about it. The ultimate result is a light wheelset which will still be quite aerodynamic and strong.
The best part about it is that since I had the hubs, and bought the rest of the parts from Mike Garcia of Odds and Endos and now Speedcific fame... that means I have to build the wheels myself. Considering that's one of my favorite things, it makes the whole project even better!
 Tonight, I got home at about 5:30pm, got to work on the wheels, and now it's after 9pm, the front wheel is done, and the rear is coming together. I really took my time building up this set, and hope it shows when they finally hit the road. Of course there are other things that I really should be doing with that time, but I enjoy this far too much to go and waste my time being responsible. :)
Friday, June 27, 2008
Bike Tools Etc
However, that's not what made me a real fan of the outfit. I enjoy building bike wheels, and I like using good tools. So, when I saw that DT, a maker of arguably the best spokes out there (and definitely the best aluminum spoke nipples) had a spoke wrench, I really wanted to give it a try. At $48, compared to the classic $8 Park wrench, it was a steep premium to pay, but it looked like a good, strong design that would serve me well... so I finally decided to go ahead and order one. Initially, the spoke wrench worked very, very well, especially on softer aluminum spoke nipples, where higher torques needed for high spoke tension can result in rounded (and thus, useless) nipple flats. The four-sided design held on very securely, and the nice, heavy, chrome design felt good in the hand.
However, after about a year of use, I noticed that the DT was starting to fit a little loose on the nipples, and came very close to rounding the edges of a couple. Since these were all brand new DT aluminum nipples, and they still fit tightly with the Park spoke wrenches, I couldn't help but come to the conclusion that the DT either wore, or stretched. Looking at the design, neither made sense, but I couldn't argue that the wrench just didn't fit well at all. So, I contacted DT directly, figuring that any high quality shop-grade tool would have a lifetime warranty, just like you would find with S-K or Snap-On, or even Craftsman. However, the reply from DT was basically a brush off, telling me that I was out of luck.
So, hoping to get better results, I got in touch with Larry at BTE to see if he had any contacts I could speak to. It had been a year since I bought it, so I didn't even bother asking him to return it. However, he offered to take it back, even though I looked and couldn't find my receipt. Not only take it back -- give me a refund, not just store credit. That type of customer service will win me as a dedicated customer. Of course, to say thanks, I placed an order for double the price of the spoke wrench. Now, if there's anything I need, I try to remember to check and see if BTE has it first, and if the price is anywhere near where I can get it from elsewhere, I'll just go with BTE.
Moral(s) of the story:
- Get bike tools (and some components) from Bike Tools Etc.
- There's still no spoke wrench as awesome as the Park, except for the newer four-sided Park.
Problems can be opportunities!
Grace has found a new riding buddy in the form of another woman mountain bike racer, and they've been riding like crazy! They're getting along great, and having a bunch of fun. Just the other day, they went out and rode High Rocks (aka Ralph Stover) and found some new, technical trails. Riding some of these trails, Grace breaks a spoke in her rear wheel. When she tells me about this, I'm a little worried that she's getting into freeriding, something you don't necessarily want to do on an 18lb bike!
Well, turns out the broken spoke wasn't caused by her abuse, but instead by a mistake of mine... when we first got the wheels, her chain overshifted the big cog and wound up between the cassette and the spokes, which chewed up the spokes. The spoke that broke was one of those, and broke at the spot where the chain had chewed it up. So that's good news. Looking at the spokes, I realize I could just replace the damaged spokes, but what's the fun in that?
A little bit of research later, and an email to Larry at Bike Tools Etc., and I decided on the Sapim CX-Ray aero spokes. Aero spokes are ovalized to help them slice through the air, but on a mountain bike, the speeds aren't high enough for that to really be a benefit. No, the real reason for using the CX-Rays is that they are supposed to be incredibly strong, despite being among the lightest spokes out there. I guess the forming process which turns them into an aero spoke strengthens the metal. Either way, they've got a great rep, and will save almost 90 grams over the spokes I pulled out of the wheel!
When I rebuild the wheel, I'm also going to replace the Stan's rubber NoTubes strip with a valve stem and 3M Kapton tape, which should save about 50 grams. I also have a pair of new Kenda Klimax tires ready to go, which I fully expect won't get the Grace seal of approval, as they're only 345g and really have no real tread to speak of. Still, that's another 100g and it's at least worth a try!
With those changes, if I were to do them to the front wheel as well... we're nearing sub 18lbs on her bike... and aside from the Klimax tires, it should still be perfectly usable and reliable, not just a scale queen.
Sunday, May 25, 2008
Project 18 - adjustment...
I realized that the thick neoprene chainstay guard was still in place, and there was quite a bit of dried mud on the frame. Okay, so that's getting a little crazy -- but after pulling off the chainstay guard and giving the bike a good wash, the weight is now 18.52lbs.
Yeah, I fully realize that I'm taking it a bit too far, but let's be honest, to get it this light, you really kinda have to. I'm enjoying myself and Grace is happy with the results, so no problem!!
Project 18 - success!
 Back in March, I mentioned my plans to get Grace's mountain bike down to the 18lb range. While a fully rideable and reliable mountain bike weighing in under 19lbs sounds like an impossibility, it's been done. Of course, she's riding a road cassette and dérailleur, and the front dérailleur has been pulled off and replaced by a very minimalist chain guide -- you can't get to 18lbs without making some compromises (or massive investments) -- but we've succeeded. I still have some work to do and some more parts I'd like to order. Unfortunately we're into the realm of diminishing returns, and to see a sub 18lb weight, we're going to be looking at those massive investments.
At some point I'll detail the work I've done to get the bike down this low. In the meantime, Grace has been absolutely LOVING the bike!
The typical response of the non-weight weenie to the investment of time and money required to accomplish a bike this light is "why not just lose 5lbs from yourself". Sure, that can be done ( and she's been doing that, too) but if you've ever ridden a bike that's 5lbs lighter, you'll know it rides TOTALLY different, and if it's been done right, it's different in a fantastically good way. Ask Grace, she'll attest to it.
What's really sad about this success is that Grace's 18.65lb bike is still equivalent to a 32.6 -- that's thirty two point six -- pound bike for me, based on body weight percentage!! To draw even with the 26.6lb weight of my Santa Cruz, we'll have to get her bike down to 15.2lbs!
Sunday, March 16, 2008
Life is good... again.
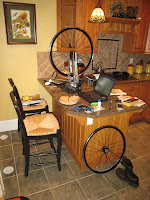
 Needed to work on the bikes on Saturday... yes, I should be working on the house, but working on the bikes is funner. It was sunny and warm (for mid-March) so I set up the Minoura stand on the side porch and got to work. It reminded me of the good times of working on bikes at Monica and Rich's in North Carolina.
This made me realize something. I was reading some bike magazine, and they had an interview with this mechanic who has worked for many of the biggest MTB racers. I remember looking at the picture of a big, kinda chunky guy, with a HUGE smile. Since then, I've often thought that sometimes I enjoy wrenching more than riding. Not all the time... but after a crappy ride, I can't help but think of that fat, happy mechanic and wonder if I should just stick to the wrenching. :)
Sunday, November 18, 2007
I could get used to this.
Today, for the second day in a row, everyone left and I was at the house. I set up shop in the garage, enjoyed the beautiful weather, and worked on bikes. Dug into Rich's music collection and fired up the Grateful Dead. Buddy sat outside with me and kept me company. Nothing I had to do, no responsibilities, just hanging out, listening to music, and working on bikes. Good times!
Yeah, I can live like this.
I spent today more or less like yesterday. Everyone got scarce, going shopping or something like that, leaving me back at the house with the dogs and the bikes. I set up shop in the garage, and worked on the bikes. Today I added some music, and all was well. Sunny and warm, and plenty of time to just sit and work with the bikes.
When Rich finally got back, I informed him that whenever he's ready for a live-in bike mechanic, I was ready.
When Rich finally got back, I informed him that whenever he's ready for a live-in bike mechanic, I was ready.
Subscribe to:
Posts (Atom)